Welcome to Flyout Tutorial
This tutorial was created a week after the game came out.
Any info here is gathered by 1 person who didn't have access to the game before and may be incorrect. If you find any issues, please report them on discord to ejtako_
To start, check the tutorials on the left. They are mostly in order, so by going through every tutorial from the top you'll be able to learn the game.
If you like our work please check out other tutorials and if we helped, help us by donating (more info on the main site)!
This tutorial is still being worked on, there'll be twice as much content and the tutorials will be bigger.
Editor Tutorial
The editor for Flyout is a great tool, but it is a bit annoying (especially if you don't know it's flaws yet). Some parts of it are similar to 3D modelling software like blender.

Let's start from the left top corner:
-Menu: allows you to load, save crafts, exit the game etc.
-Camera: changes the perspective in the editor
-Ruler: useful for measuring stuff on your craft
-Settings: under the settings button there's Inputs (I'll talk about them in other tutorials), Radar cross-section (checks how well your craft can avoid radars) and Description (so that you can describe stuff about your craft).
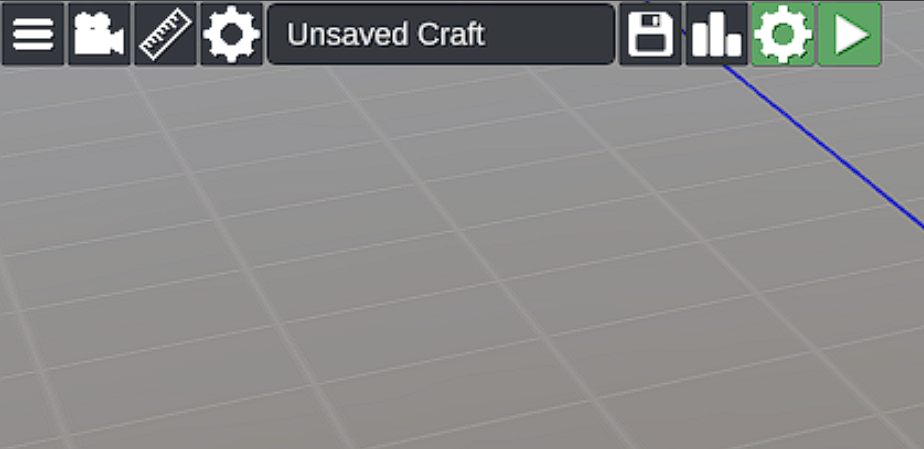
-Save: a button for saving your craft (you'll also be able to rename it)
-Statistics: some statistics like the weight, length etc.
-Spawn Settings: here you can choose other airports and the position of your craft on spawn (if it spawns in air on in the ground).
-Play: take off! (hopefully)
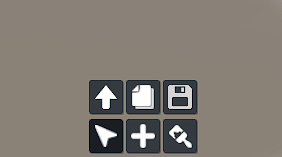
On the bottom there are 3 tools, first is for selecting parts, second is for creating new parts and third is for painting. But when you click a part 3 new buttons show,
which are for moving parts, copying them and saving "subassemblies".
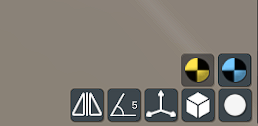
To the right there are 5 buttons:
-Symmetry: a feature to place things in symmetry
-Angle snap: a snap for angles when rotating
-Tools: a move, rotate and scale tools that work like in 3D modelling software
-Orientation: switches between local and global rotation and position shown in the inspector
-Connection nodes: things like engines and fuselages can connect, but you can turn it off here
And then there are 2 buttons for toggling the center of gravity and center of pressure.
On the right there is an inspector in which you can either:
-see a tree of the parts
-inspect a part
-pick parts to spawns
If you don't have any part clicked nor the create parts button pressed, you will see a tree of all parts. It's useful for example when you need to find a part that's hidden in the fuselage
If you click the create parts button, you'll see all the possible parts to add. An inspector will turn on if you click a part, where you can change all of it's properties.

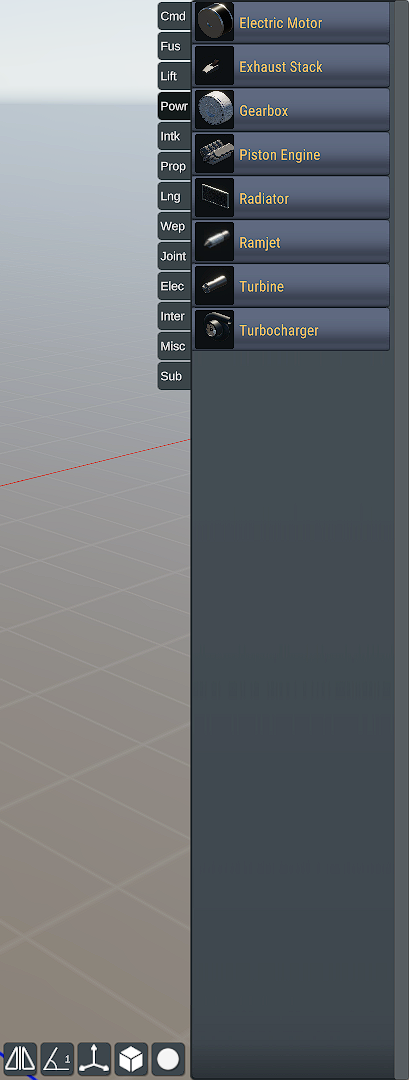
Adding parts
To add parts, click the + button on the bottom and pick a part from the right. Then place it anywhere you want it to be.
Removing parts
Click on a part, then click the up arrow from the 6 buttons on the bottom and place it in the trash button
Moving parts
You can move parts by clicking on them and moving them with the arrows, or by clicking the same up arrow and placing them anywhere.
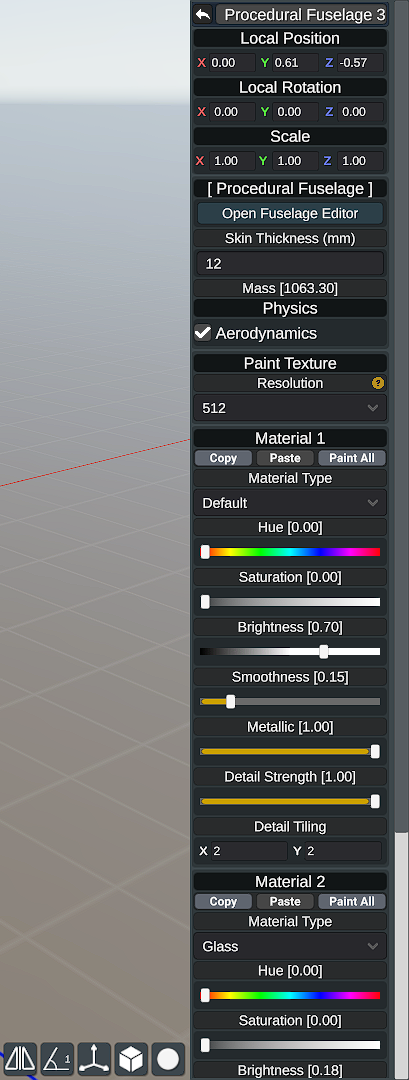
Editing parts
To edit a part, click on it and change it's properties in the inspector on the right.
Fuselages
Fuselages are very intuitive to create in this game. In the "Fus" (Fuselage) section you can choose cockpits, fuselages and other stuff. In the game there are 3
types of fuselages with different resolutions: 16, 32 and 64. It basically means how many points a fuselage has.
To start, let's pick a 16 point fuselage. Disable the symmetry and while holding X, place it on the pilot. Click on it and in the inspector choose "Open Fuselage Editor" or click Tab.
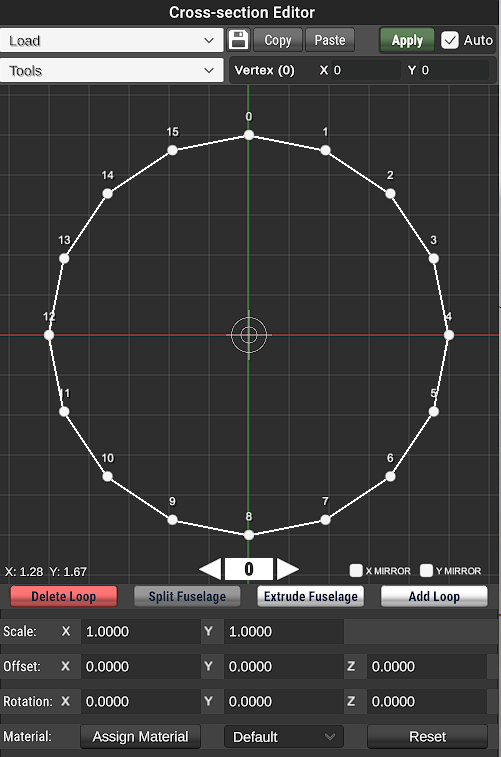
Starting from the top you can load presets and save already made ones. Then you can save presets, copy, paste them and apply them, those buttons are self explanatory.
On the second line there are tools like straighten, blend and merge. To use them, first click the tool, then select the right verticies with shift + left mouse button,
move the slider and apply while still holding shift, then click the apply button at the top. On the left there's the X and Y position of the selected point.
The number and arrows are for choosing the loop of the fuselage you are working on, you can choose between loops using the arrows. X and Y mirror allows you to mirror the verticies to make a
symmetrical fuselage.
Delete Loop - Deletes the loop you are currently working on (you need at least 3 loops for this to work)
Split fuselage - Allows you to split the fuselage into 2 parts (you need to have a middle loop selected and there needs to be at least 3 loops)
Extrude fuselage - Extrudes the fuselage like in 3D modelling software. After extruding move the loop with arrows.
Add loop - Allows you to make a loop in the middle instead of extruding. Useful for adding details.
Now when you know how loops work, scaling, offset and rotation work by moving the whole loop.
To make holes or windows, use the "assign material" button with "hole" or "window" instead of "default" material. The "reset" button clears the changes in materials.
Wings
Wings are the most important part of a plane. To edit a wing click on it, and then in the inspector click "open wing editor" or click Tab. The 3 buttons for moving, copying and saving now
are for moving, spliting and accepting.
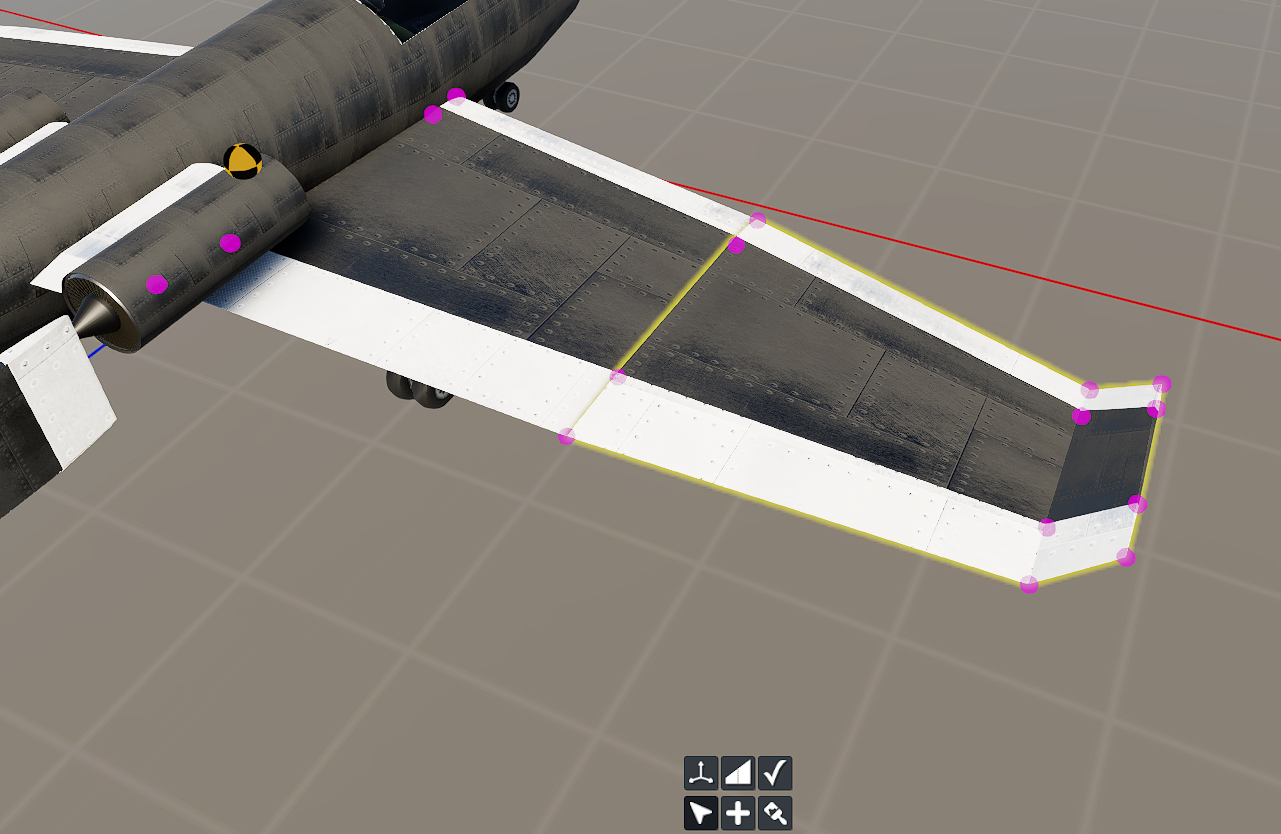
To make the right shape for a wing try moving the points and splitting the wing to have more points. After you're finished, accept the changes.
You probably see that something is not right in the wing, isn't it? Go to the inspector of the wing and change "leading edge" and "trailing edge" to standard. Also
on all your thicker wings you should place fuel tanks (also done in the inspector).
Painting
You can find the paint tool at the bottom of the screen. After clicking it you'll see a brush and you will be able to paint over your plane. Before doing that,
save and load the plane again, else you wouldn't be able to paint some of the parts.
On the right in the inspector you can see options for the paint tool. They are pretty simple so I won't go over all of them.
Useful things to know:
-There are blueprints, basically reference. To access it click the menu button and choose any png image.
-You can snap to axis while holding X, Y or Z
-There's no undo, save often
Balance
Planes are complicated, right? Well, yes, I'm not going to say they aren't. But to make a working plane in Flyout you only need to know the basics, and we've got you covered!The most important part of a plane is it's balance. The position, size and shape of the wings, the power and placement of engines and the mass of the plane have to all be considered when building a plane. The center of mass is shown in Flyout editor as a black and yellow ball, while the center of pressure (or lift) is shown as black and blue ball.
Let's start from the wings. The place of the center of lift is determined by the position of the wings. We want the center of lift to be behind our center of mass, which usually means that we want the wings behind or on the center of mass. The plane will be highly unstable if the center of lift is in front.
But you can overdo it. So how to know the perfect spot? If your plane flips during take off, or is very unstable and after a hard pitch up it goes right into the ground, you probably have the center of lift in front of the center of mass. Try putting your wings more to the back, but if your plane doesn't take of at all or it does but it pitches down a lot, you probably have put your wings too much to the back.
With your engines you don't have to be that precise but still you have to remember some things:
-If your engine is too low, the plane will pitch up while accelerating
-If it's too high, the plane will pitch down.
-Also remember that if it's too far back, the plane may be a bit unstable when accelerating quickly (if it happens while taking off, try using for example 70% of the engines)
Basically if the engines are roughly in the middle, it's good, but you don't have to focus on that much. As you probably have seen, a lot of planes have engines under the wings or at the back of the plane and they fly great.
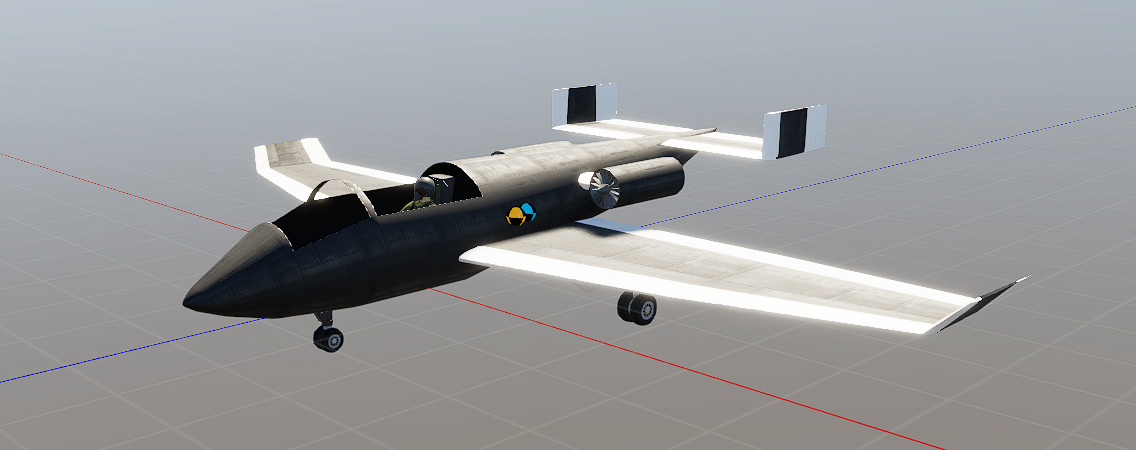
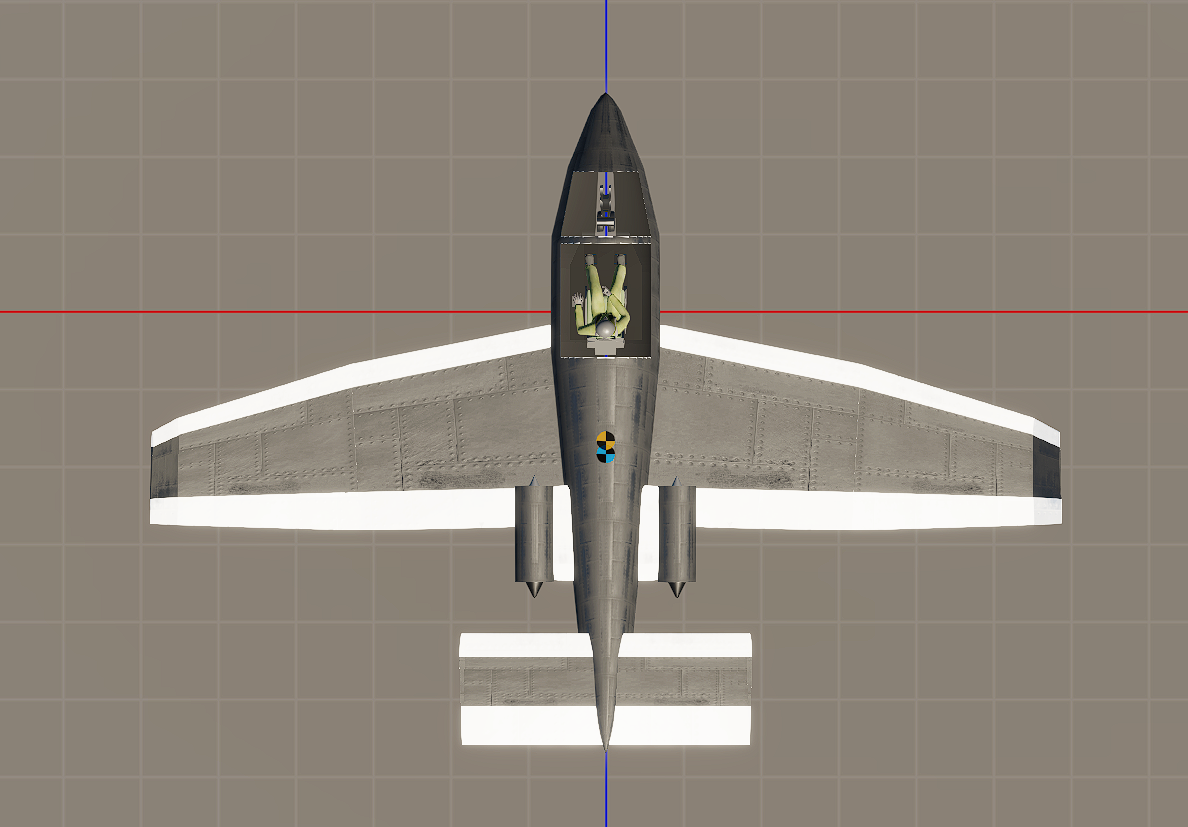
As you can see on my plane that flies great, the engines are pretty close to the center of mass, and the center of lift is pretty close but a bit behind the center of mass. But what about the shape of the wings? The shape also determines where the center of lift is and theoretically bigger wings means more lift and more drag. Keep it in mind when making the wings.
Most aircraft have a slight dihedral angle between wings. Why is that? It produces lift in a way that makes your aircraft more stable on the roll axis.
The example here is 10 degrees which would be a bit too much. I suggest an experiment for you, try making wings that have 5 degrees of tilt, and then none and see how the plane will behave.
Engines
In the game you can choose between many engines: electric, piston, ramjet and turbines.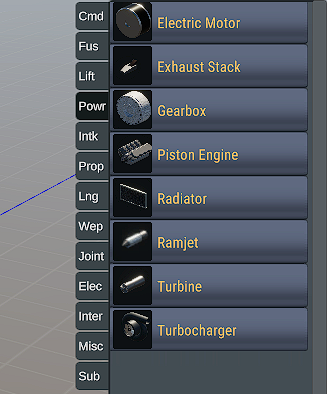
Electric
After placing the engine you can set the radius and length, then the max torque is calculated from the size and you can choose the amount that suits you, and also set the max rpm for the engine. Obviously for the electric engines you need power, so in the electrical tab there is a battery. Now you need to get a gearbox from the same tab and place it preferably in line with the engine. Then put a propeller from the prop tab and put it also preferably in line.
Now click on the gearbox in the inspector, set the electric motor as input, and then on the propeller set the gearbox as the power source. If it works then that's great but life isn't always that easy, try tuning them.
Some tips for tuning:
-If you set the engine to for example 5000rpm and it only spins to 2000rpm, that means that it has too much load on it. Try increasing the gear ratio a bit.
-Maybe you have the opposite problem, the engine spins up too easily? Decrease the gear ratio.
-To check the rpm's right click on the engine and the propeller.
-Try playing with different values on your propeller.
Ramjet
Ramjets are the best engines for speed, but they come with their flaws. One of them is that they don't produce power when the plane is stationary, so they can't be your main source of power. They'll activate automatically when you reach a certain velocity around 0.3 mach and they produce more and more power the faster you go. There isn't much tuning you can do to them, other than changing the combustor temperature (basically hotter means more thrust). They are kind of useless before mach 2.
Turbine
Turbines are probably the most used engines in the game. Let's go through the engine's tuning possibilities:
General The size of the engine, bigger means more power but more weight, more fuel etc. and the amount of spools an engine has. More spools theoretically mean more efficent engine.
Fan: There are 2 bypass types, low and high bypass, and you can also have none. High bypass fan means more air, so usually more power. Bypass ratio changes how much air gets into the engine, and as the game suggests higher values mean less thrust but more efficency.
Compressor: Changing the pressure ratios here will tune the rest of your engine to obtain that ratio. Every spool has a section of the compressor, while tuning your engine look at Overall Pressure Ratio. A higher pressure ratio mean a more efficent engine. Raising your tip mach will make more power, but it can your engine to "pop with fire and loose power".
Combustor: You can change the combustion temperature, like in ramjets higher means more power, and the idle throttle. If your engine turns off at idle, you should make the idle throttle a bit higher. You can also change the type of combustor, the annular is basically the best.
I'll leave Turbine unexplained, flyout calculates it by itself.
Power Turbine: Used to power high bypass fans and other stuff.
Afterburner: Needed for generating more thrust, but it burns a lot of fuel. Again more temperature means more power, throttle threshold changes the amount of throttle needed for the afterburner to turn on. Bypass mixing allows for more air to get into the engine, but as the game suggests it makes the power with afterburner off a bit lower.
Nozzle: Variable area nozzles make your engine more efficent, 2D and 3D Vectoring nozzles change the direction of thrust to make your plane turn more easily. You have to set them up at the bottom like you do with control surfaces.
Piston
I don't know much about piston engines yet so I won't make a tutorial on them YET. I'll add one in the future.
Important note: in the game there are fuels implemented like AVGAS 115, Jet A, Butanol, Etanol, Iso-octane. All work differently and produce different amounts of power. I suggest using Jet A for Ramjets and Turbines, and the rest are for Piston engines.
Fuselage
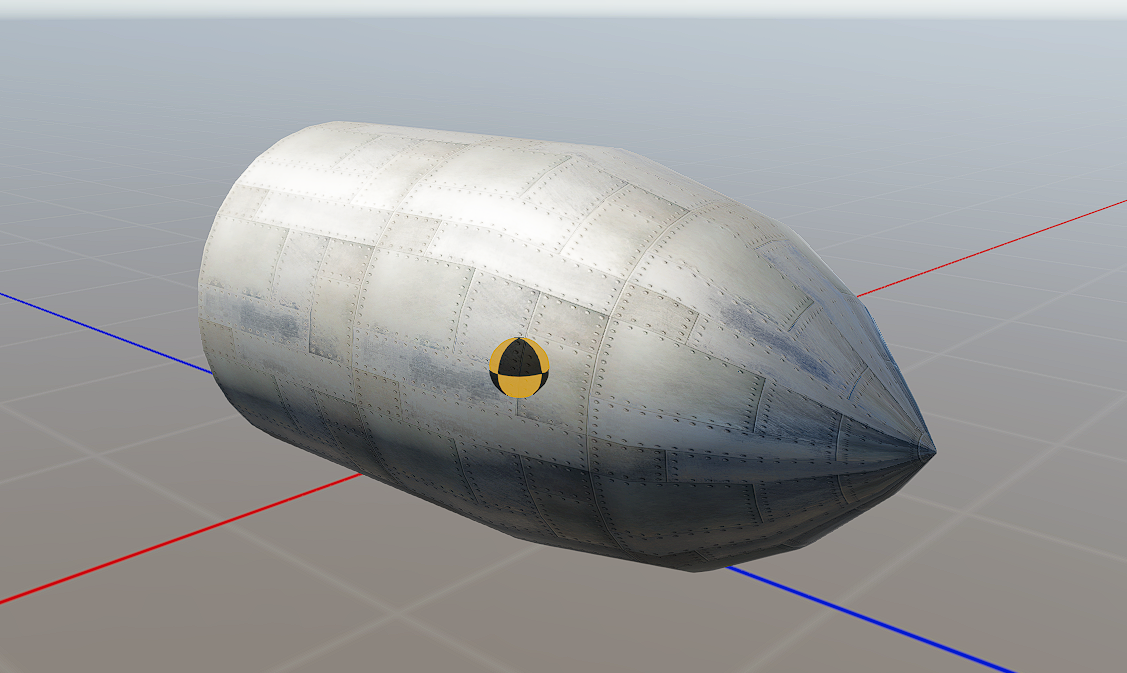
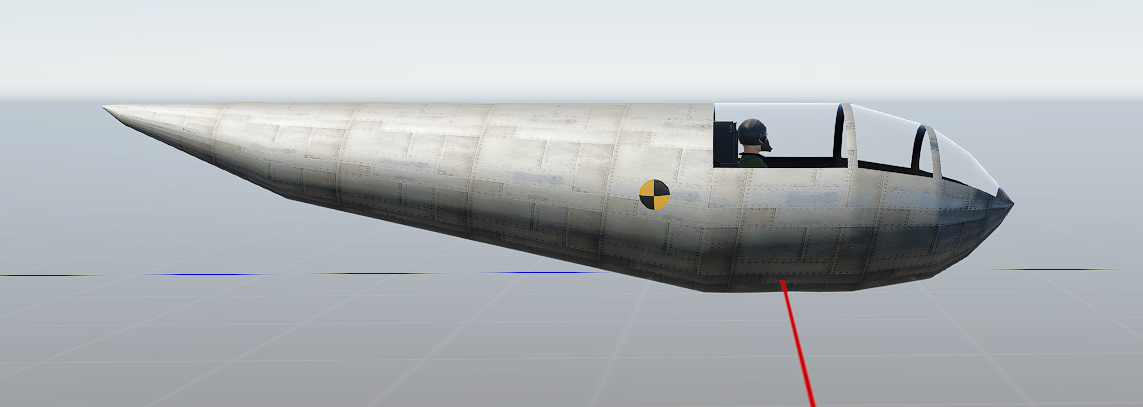
Let's start making our plane from the fuselage. Disable the symmetry on the bottom right corner, then on the right take a 32 point fuselage from the "Fus" section and while holding X, place it on the middle of your craft. Click on it and try to center it on the Y axis.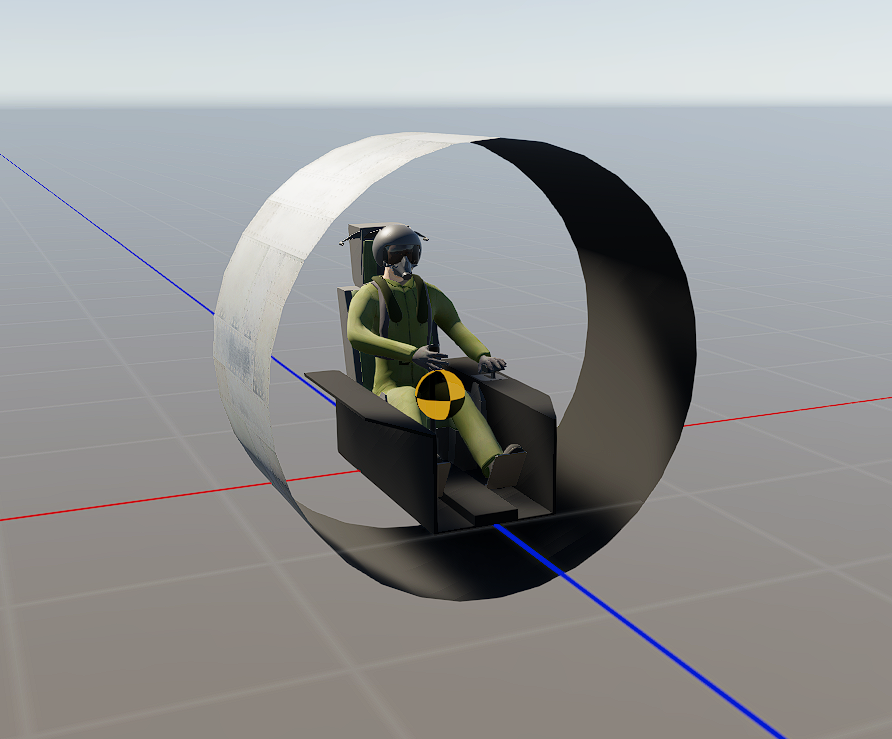
Click on the fuselage and click tab (or choose Open Fuselage Editor on the right). We don't want to make a big plane yet, so let's scale down the fuselage a bit. Click S and move the mouse to make it a bit smaller. Then copy the scale value and paste it into the second loop. If you want to move the fuselage higher or lower, I suggest leaving the fuselage editor by clicking tab again and moving it there.
Now let's make the front of our plane. Extrude the fuselage by clicking E and moving the new loop. Then scale it to your liking and repeat the process, untill you get something like that. The last loop should have a x0 y0 scale.
After getting something like that, our pilot doesn't really see anything. On the bottom of the fuselage editor there's a "Assign Material" button. Click it and replace "Default" with "Glass".
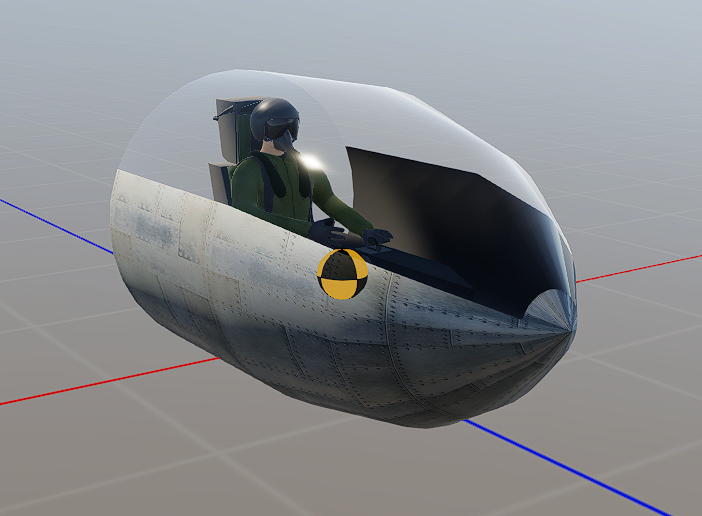
But usually planes don't have such large windows, so we'll have to split them a bit. Choose "Add Loop" and make loops right before the loops you already created, and then replace the material in between the loops from glass to default.
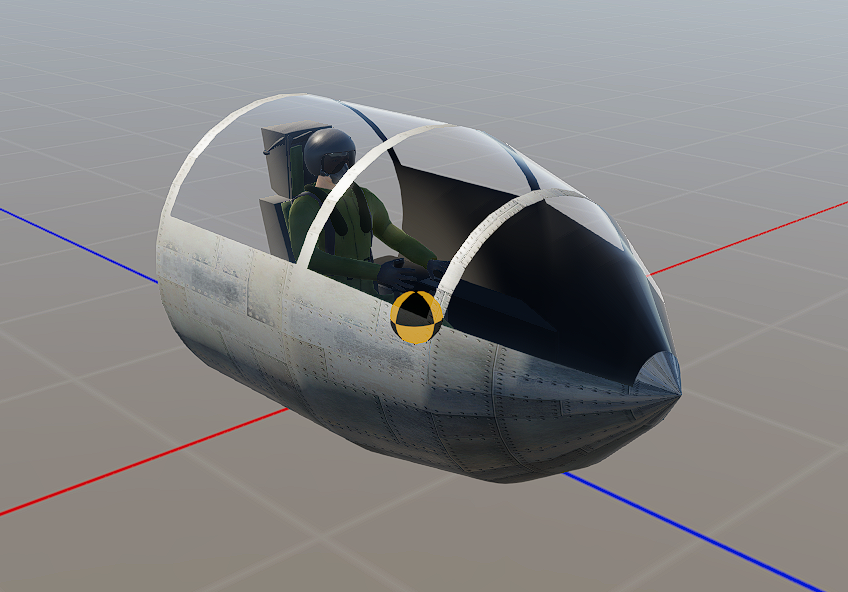
If you don't like that look, you can skip that step though.
Now let's continue making our fuselage. Choose the open loop and continue extruding until you get a good fuselage like that. Remember about offsetting it up a bit and scaling it, to make a better looking tail.
Now when you've got the fuselage, go to the wings tutorial.
Wings
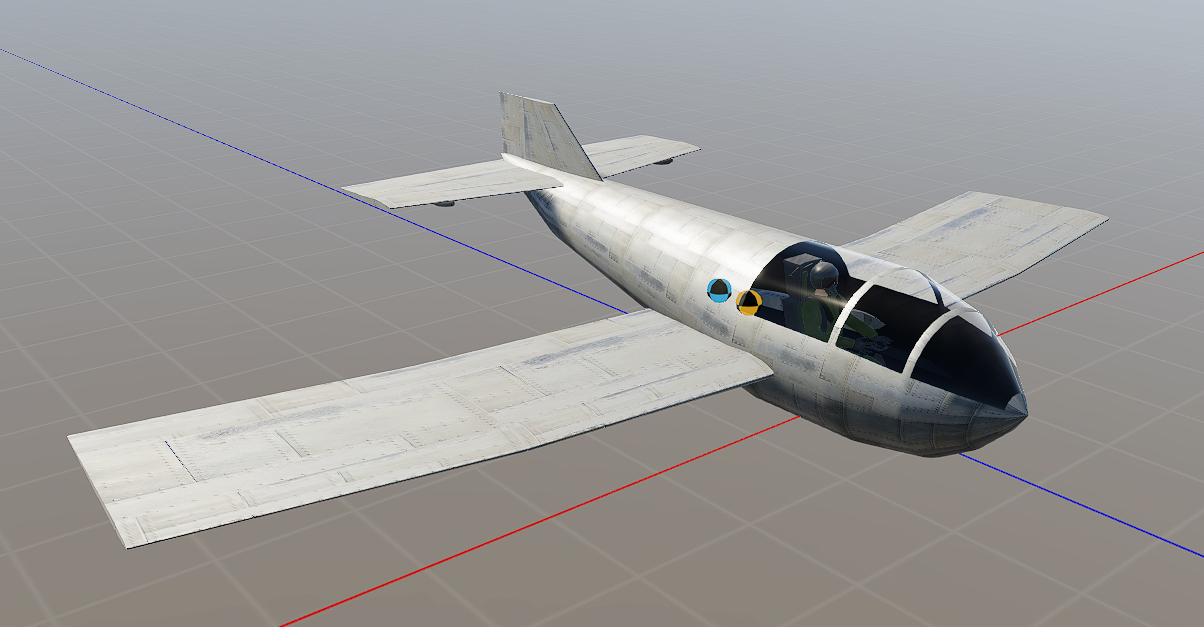
Quick reminder to save your craft! Turn on the symmetry and place a wing from the "Lift" section. Go to the inspector and set "Leading edge" and "Trailing edge" to standard.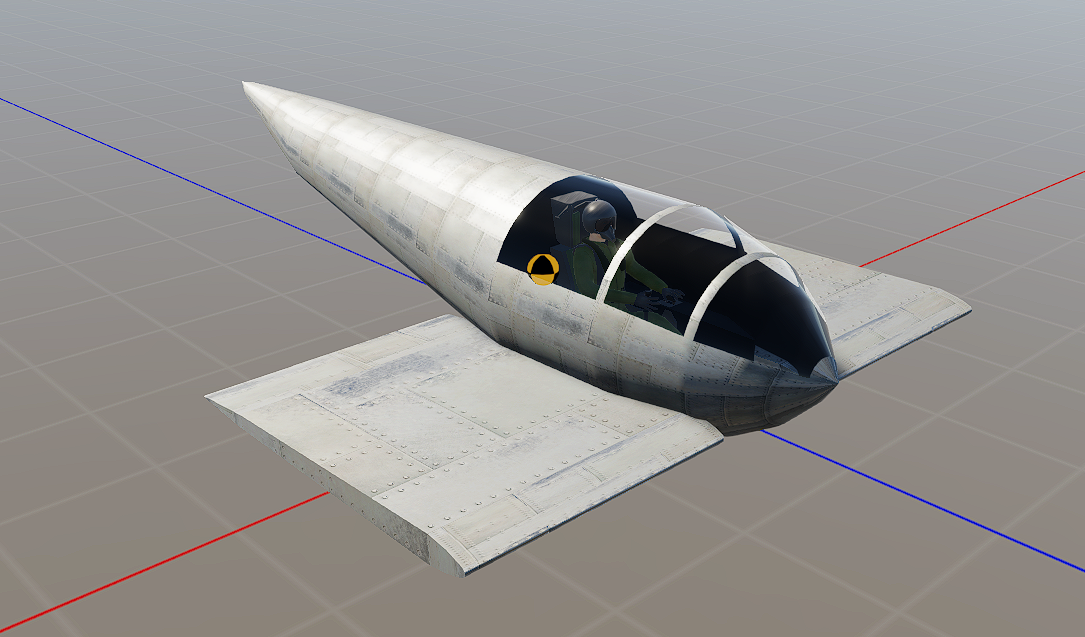
Now click Tab and choose a shape for your wings. While holding shift you can select many points at the same time. If you want to add more points to work on, click the wing button on the bottom and click somewhere on your wing. It'll add a loop on your wing. You can also scale the wings on the Y axis to make them less thick.
Now turn on center of pressure in the right bottom corner (black and blue ball). Now move the wing so that it'll be closer to the center of mass.

Make the horizontal stabilizers the same way as you did with wings. Now the center of pressure has to be behind center of lift, if it isn't move the wings backwards. After that let's make vertical stabilizers, turn off symmetry and place it while holding X. Rotate it 90 degrees either by using the rotate tool or changing the Z rotation in the inspector.
We also need control surfaces. Click on the back of the wing and in the inspector, set roll and set it to 20 degrees. Now on the second wing do the same and set -20 degrees.
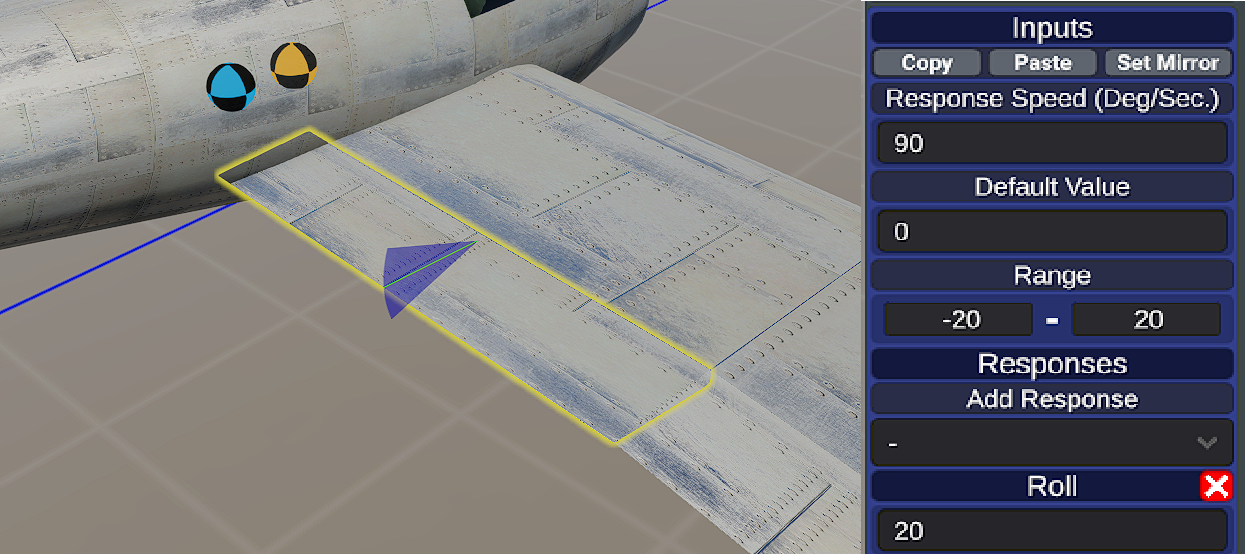
Do the same at the horizontal stabilizers for pitch (both 20) and for vertical stabilizers for yaw (also 20). Now save the craft and test it.
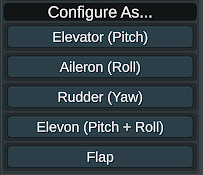
Update: With patch 0.2172 30/11/2023 came a new feature with presets for the control surfaces. Press "Elevator" on horizontal stabilizer control surfaces, "Rudder" on vertical stabilizer control surfaces, and "Aileron" on wing control surfaces. Don't forget that it can sometimes still give you a bad setup and you'll have to tune / invert it.
Now when holding S, D and E you want the control surfaces to turn like that. If they turn in other directions, you have to invert them (so if you had 20, replace it with -20). You finished the wings, go to the next tutorial :)
Engines
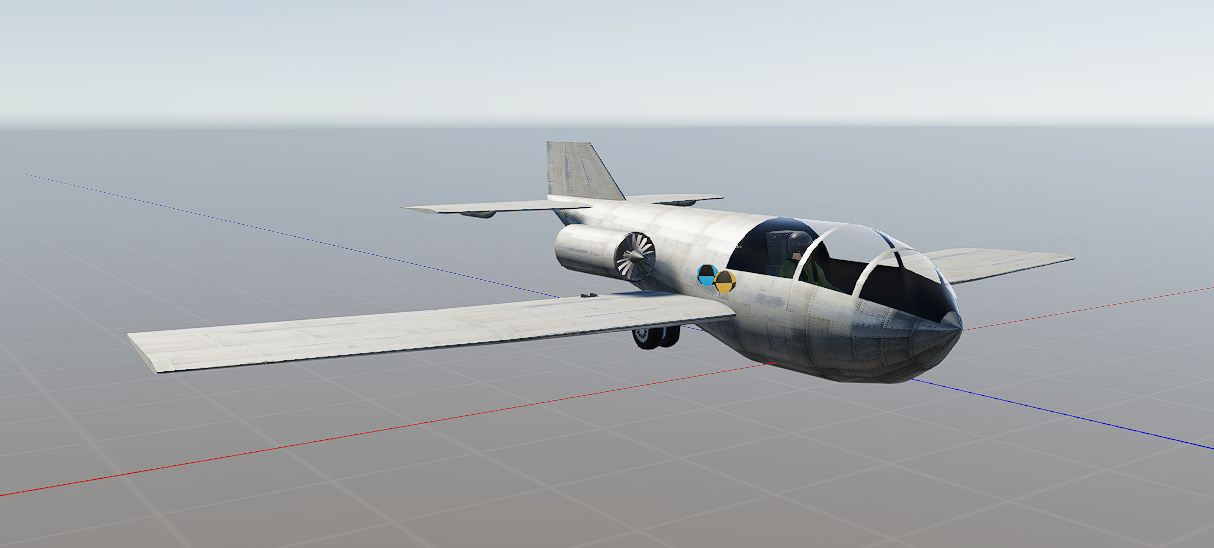
For this build we'll pick turbine engines. Go to "Powr" section and choose turbine. For now place them like that, later we'll attach them and make them look better.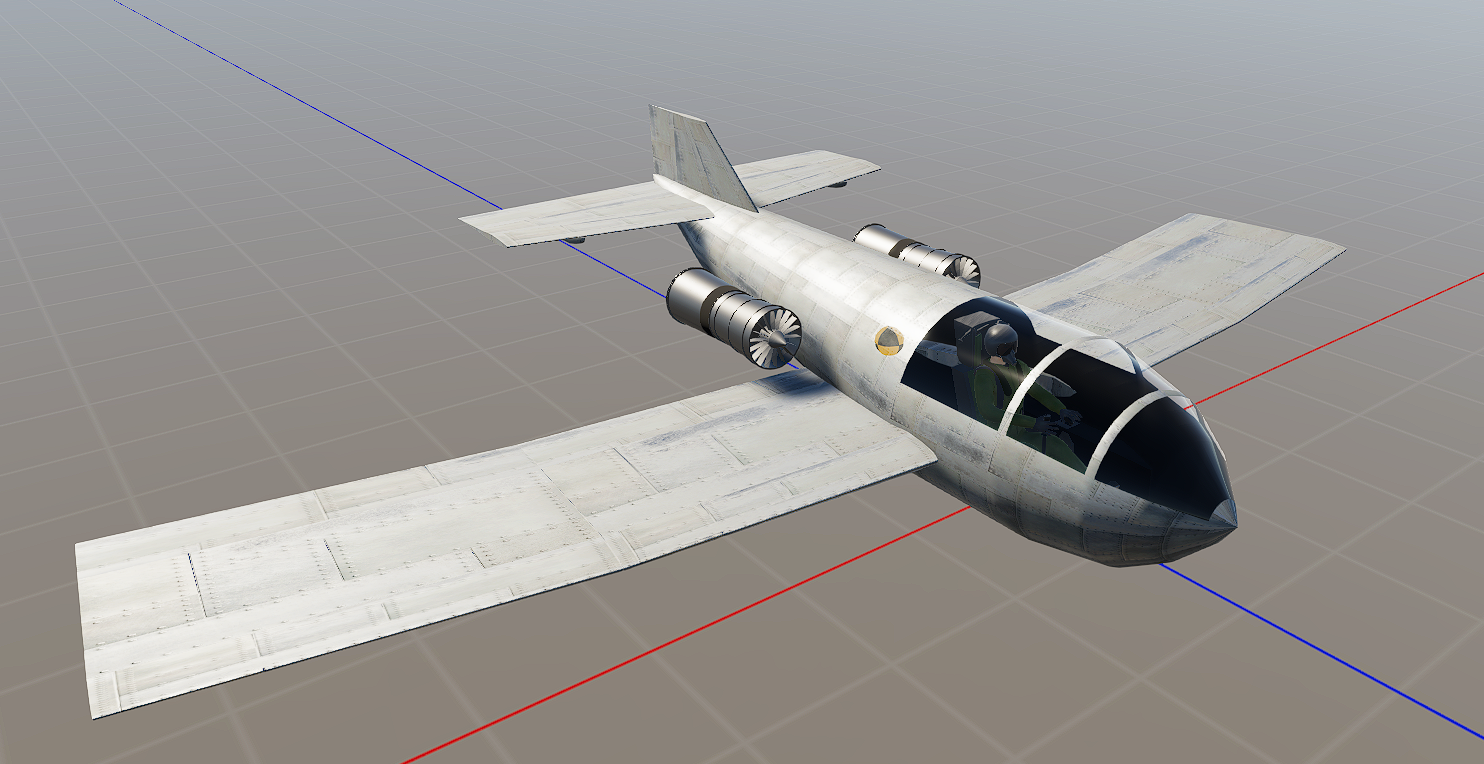
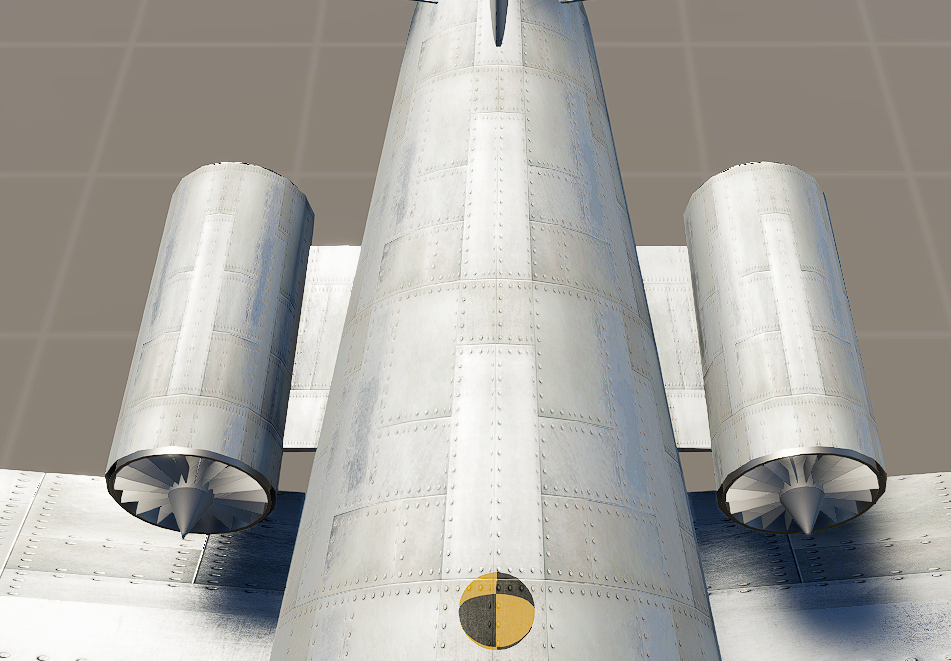
To make the engines work we need fuel. Click on the wing and turn on "fuel tank" in the inspector. Now let's get 16 point fuselages, put them on the engines, scale them and place them so that they'll cover the engines. Then get wings, scale them to be very small and make them look like they are connecting the engines to the fuselage. At the end it should look like this.
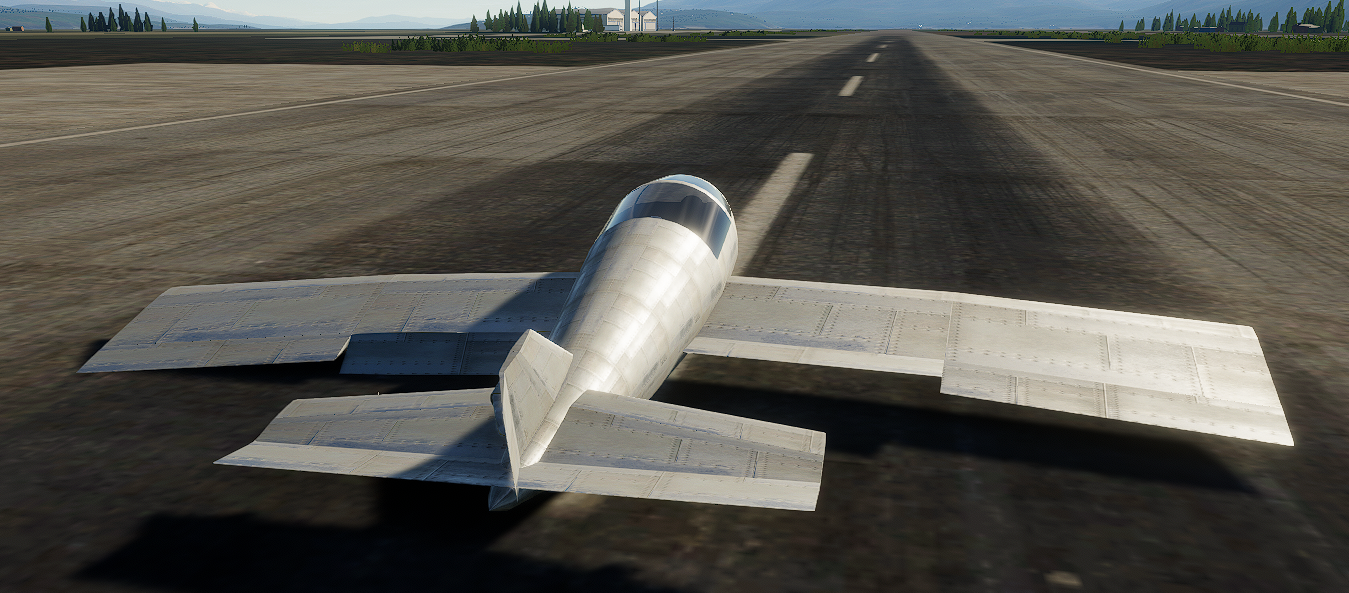
You can now spawn and they should work, but you won't move yet as you don't have wheels. In the next tutorial we'll add wheels, make the plane look better and tune it!
Rest of the plane
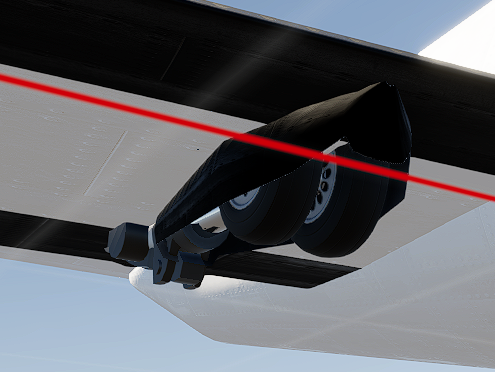
The last thing our plane needs are wheels. Put them like that, you can change their height in the inspector (both height and travel will change the length of the wheels).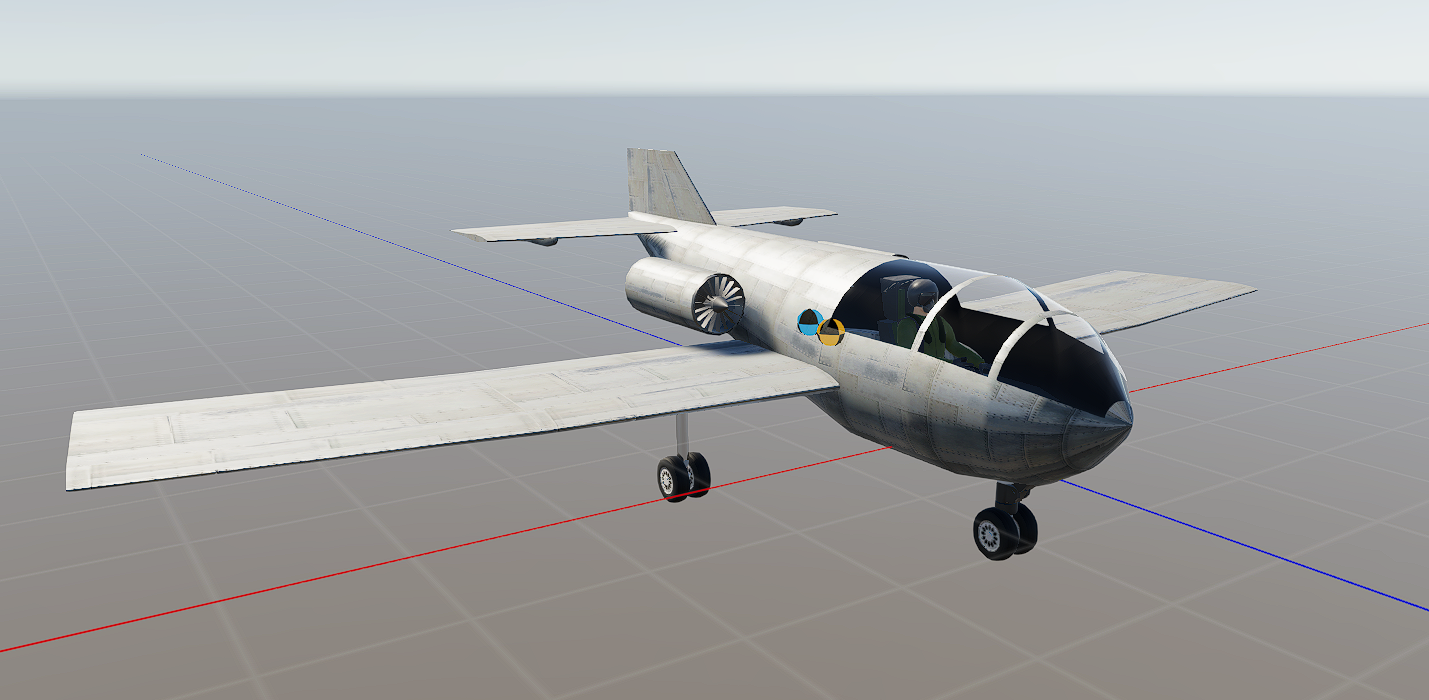
It's a pretty modern plane so let's make the wheels retractable. Click on them and in the inspector click "retract". You can change how much they retract and which way below in the settings bellow.
I made the middle wheel retract into the wing, and the front one into the fuselage. Important! Remember to put the middle wings behind the center of mass, else the plane will touch the ground with the tail while on the ground.
Now you can test your plane (remember to save it). The plane should be able to take off, land etc. If you have issues with the balance of the plane, make sure the center of pressure is just behind the center of mass. Let's go through the controls for flying:
W, S - pitch
A, D - roll
Q, E - yaw
G - retract gear
Shift, Control - throttle
B - brakes
If the plane keeps jumping on the runway or jumps when you land, try lowering the spring and damper values on the gear.
You also probably noticed that your plane doesn't turn on the ground that well, click on the front wheel and at the bottom of the inspector set the turn range from -10 to 10, and then set the yaw response to 10.
Now let's make our plane look a bit better. You probably noticed a weird bump on every wing, it's a push rod. Every wing has it but you can turn it off in the inspector. After that, let's make a cover for our landing gear on the wings from the fuselages and hole material.
Now save the plane, load it again and paint it. Click the paint tool at the bottom, choose a colour in the inspector and click "paint all". Now pick another colour and by clicking space while hovering over a part you can only paint that one. For example, hover the trailing edge of your wing, click space, and then paint it using your mouse.
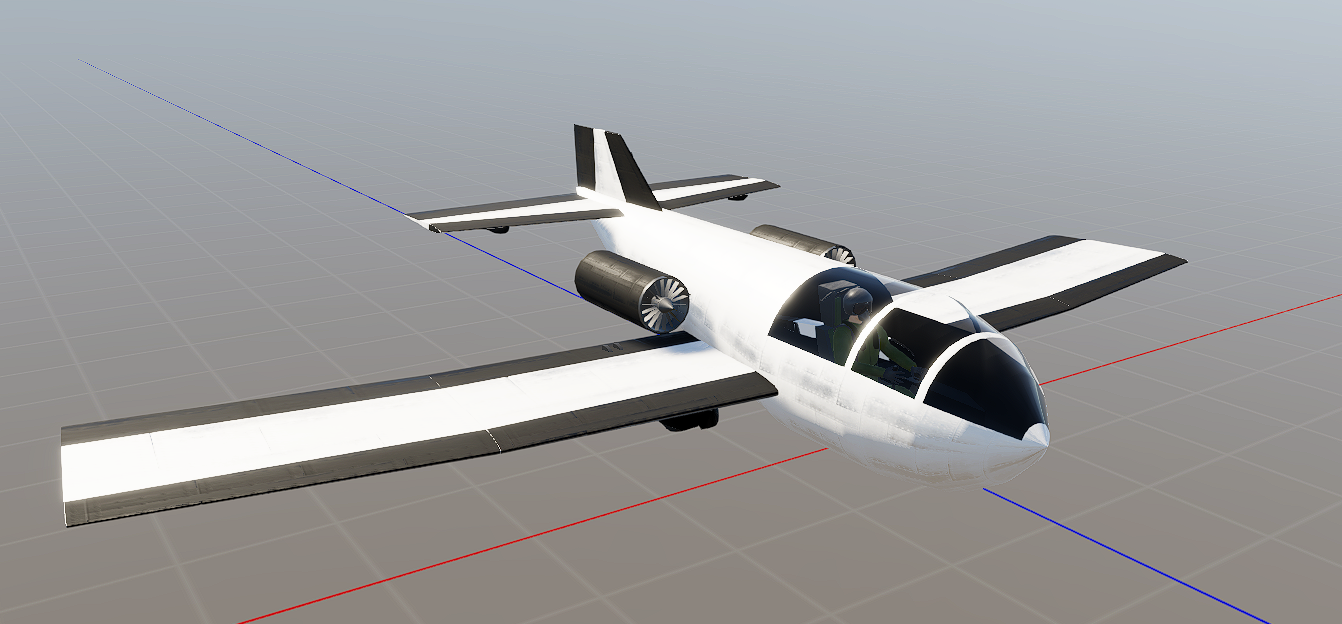
Good job, you finished your first plane in Flyout! I left the cockpit in this tutorial as I wanted to make the plane as simple as possible.
High Speed Turbine
In this tutorial I'll show you how to build a plane that'll go around mach 3 while still being relatively stable, easy to make and understand while using only turbine engines, and then maintain the flight for a couple of minutes.Let's start from the fuselage. For now you want something small, but with enough space inside so that we'll be able to put a fuel tank inside. Of course the design is yours, I made something like this. Keep in mind we are going to use 2 pretty big turbines.
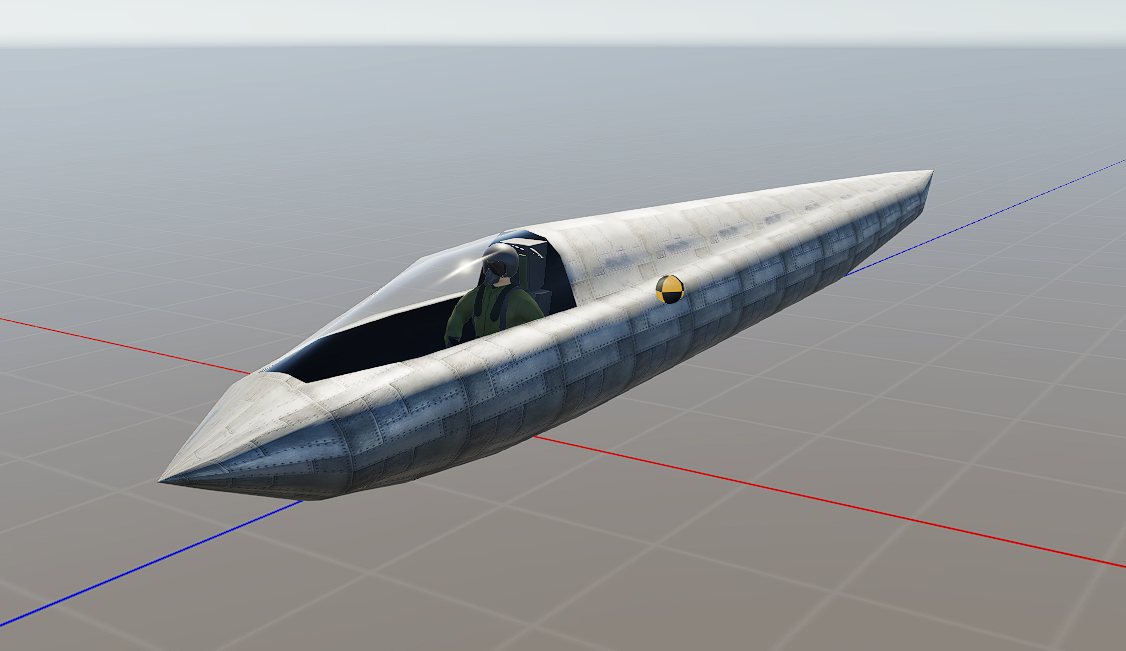
The fuselage is intentionally long, we'll have place to hide the fuel tank and also a lot of space to work on (for example the engines will be very long).
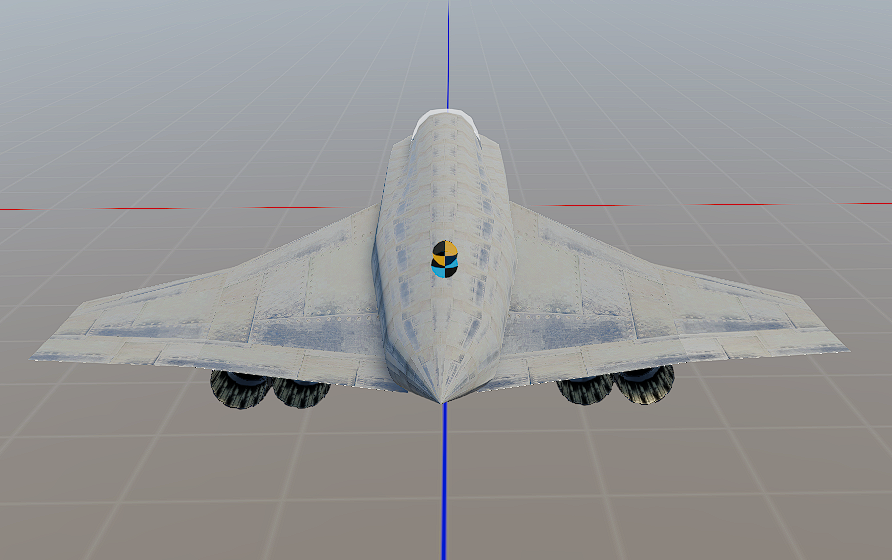
Let's work on the engines now. We'll place 2 to 4 engines depending on the size of the aircraft, I recommend placing 2 and inceasing it to 4 if you'll have not enough power. You'll want to turn on the afterburner and max the temperature and bypass mixing on it, make the temperature on the combustor higher. For the nozzle you can use whatever you like, I went with a variable area nozzle. Then let's increase the compression to something like 4 and 12, and the tip mach to 1.2. Depending on the size of your aircaft you can change the diameter of the engine, for my design I changed it to 0.45 and used 4 engines.
Now wings. As you don't need much lift for a plane that'll be going mach 3, you can make them small and very slick. I placed my engines under them. Big control surfaces aren't needed either because when the plane is going fast, you don't need to make big corrections anyways.
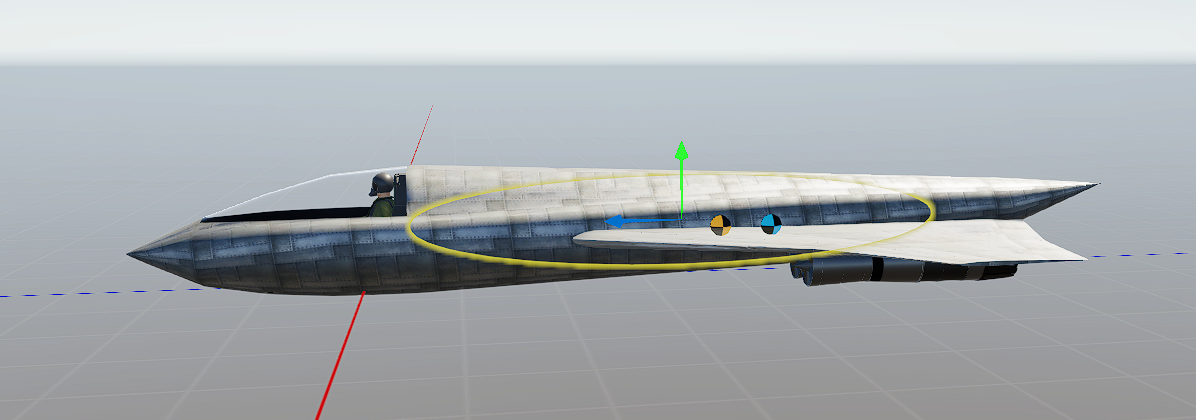
Now we'll put fuel tanks (and we'll need A LOT of fuel). First click on every wing and put a fuel tank inside. Then get a sphere and scale it so that it'll fit inside perfectly, and put fuel inside too. Let's also make improvements for high speed flight, click on all of your fuselage parts and set the skin thickness to 3mm. Now you can check the specifications with the button on the right of saving button and you should see a lot of fuel, likely more than the plane weight itself and that's good. In my case it was 1.41t dry weight and 3.58t fuel weight. Then put a vertical stabilizer and horizontal stabilizers if your design needs them.
Let's finish with wheels and looks of the plane.
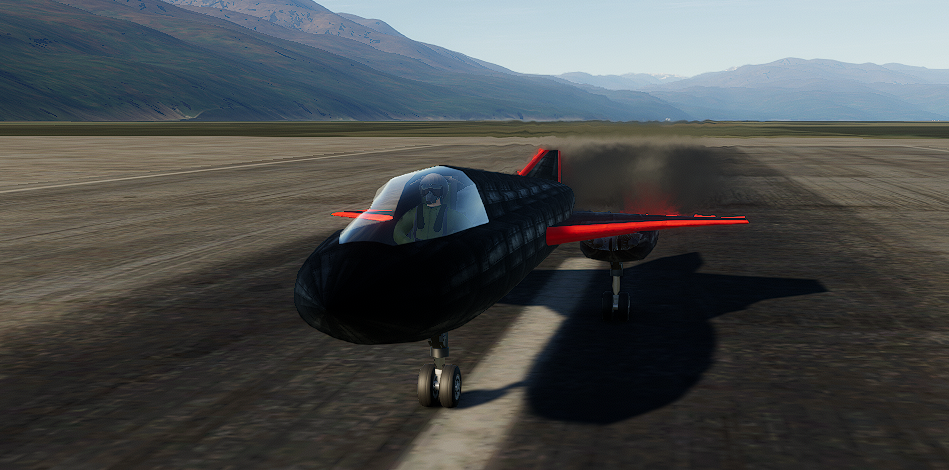
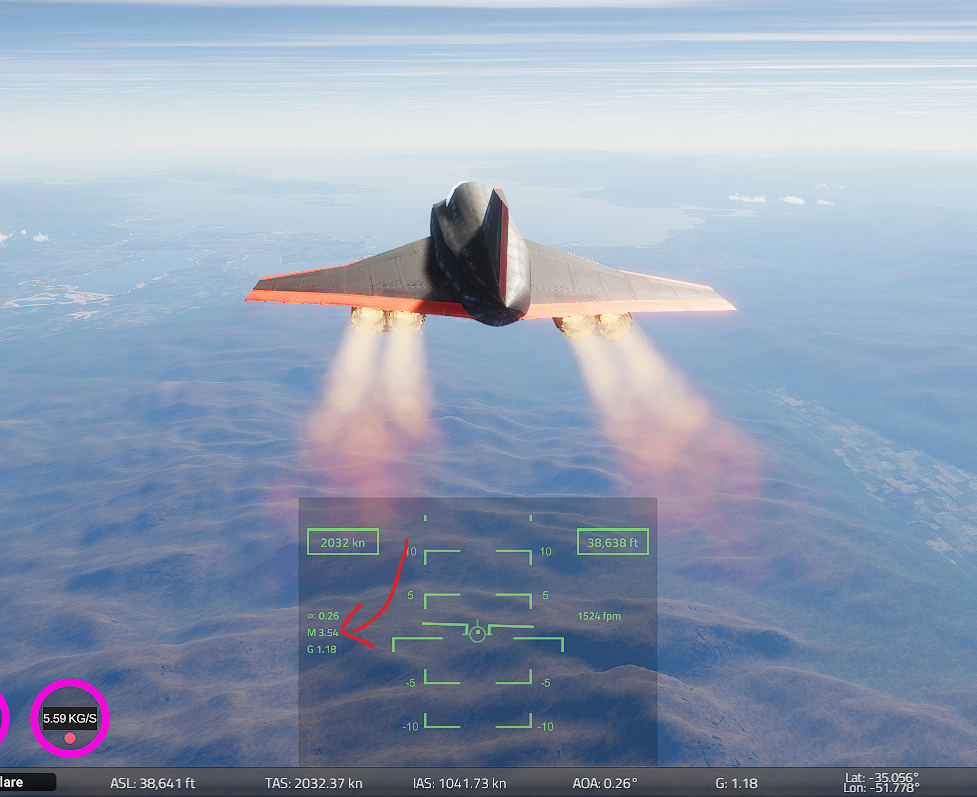
Now we can take off and you can either try flying the plane by yourself (requires extensive trimming and flying with a joystick) or using autopilot which is still very weird in this game. I did all of my full speed runs by myself without it, so it is possible. The plane will be controlling weirdly, try decreasing the angles on the control surfaces if it's too easy to turn. As you can see, the plane went 3.54 mach without almost any tuning. Now if you want to go faster try reducing drag, making your wings smaller, and making your wings more powerful.